Every time it snows these days, I’m reminded of how much I used to love snow days as a kid. We’d get the news that school was closed and a huge cheer would rumble through my house. My mom would help us get all bundled up in layers upon layers of warm clothes and we’d go outside and roll around in the snow for hours. We’d build snowmen and forts, tunnels, and towers, and collect snow in a big bowl for snow ice cream. Every kid in the neighborhood would meet at the biggest hill for sledding and snowball fights. Eventually, we’d all drag ourselves back home to warm up in front of the fireplace with hot chocolate and marshmallows. I’ve always loved the look of freshly fallen snow on tree limbs and the graceful way icicles form from the melting snow.
Recently one of my students asked me to explain why snow always looks so grey in a photograph. This can also happen when taking pictures of a beach on a bright, sunny day. There is a simple explanation for this, and a simple solution as well. First, the explanation. Every camera, regardless of it’s make or model, is equipped with a light metering system of some kind. The job of the light meter is to read the amount of light coming through the lens in order to make a “correct” exposure. The meter tells the camera what in the scene is white (highlights), black (shadows), and mid-tones (everything in between). This works great in almost all lighting situations, but the camera runs into trouble when the meter is trying to read a scene that has lots of bright areas and little else, such as snow or sand. Since the meter’s job is to find a range of tones, it’s looking for something in the scene that is neither dark nor light to set as “middle grey”. It will pick a middle range point and set half the image lighter than that, and the other half darker. So, when the meter sees a field of white snow (or bright sand), it looks for a middle tone and can’t find one. The only thing left for it to do is tell the camera that the snow is the mid-tone, and render it grey. So, what can you do to make your snow white or your sand bright? The solution is simply to add more light to your image by changing the exposure. There are a few ways to do this easily. If you shoot on the automatic setting, you can add exposure by using the exposure value button, which usually shows up as a plus/minus button on the camera. Each click towards the plus side will add a bit more light to your image, giving you more exposure and white snow. (You can reduce the amount of light in any image that’s too bright by clicking towards the minus sign.) If you’re shooting in manual mode on your camera, simply add exposure by either increasing the aperture opening, or reducing the shutter speed. Both work equally as well.
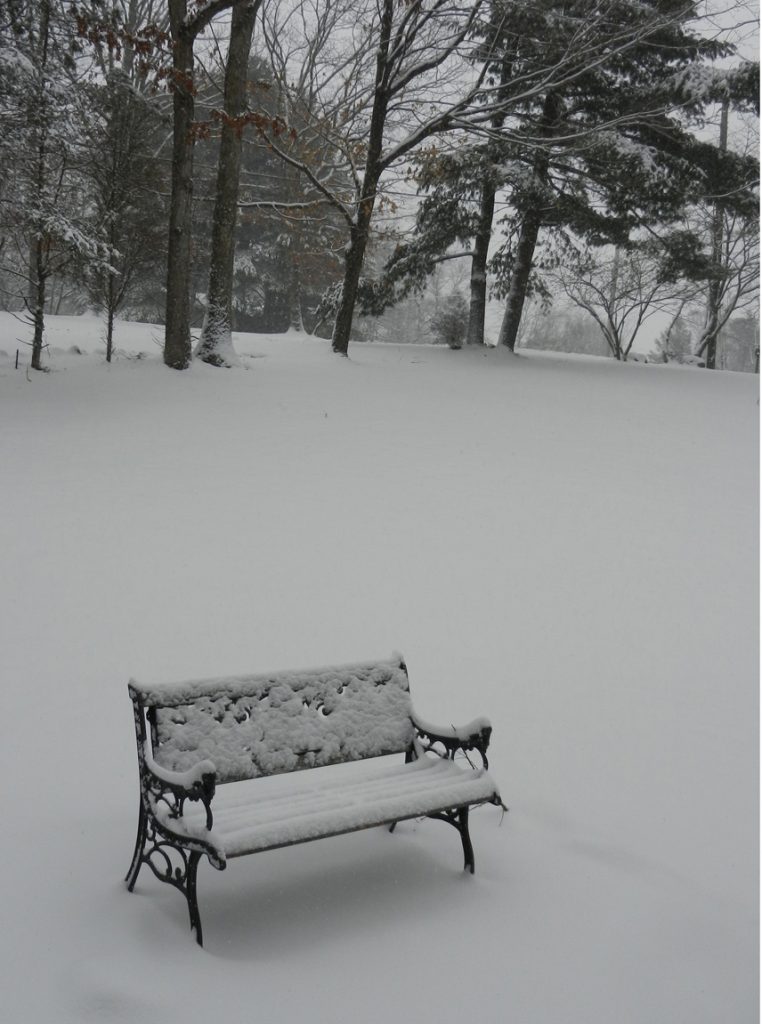
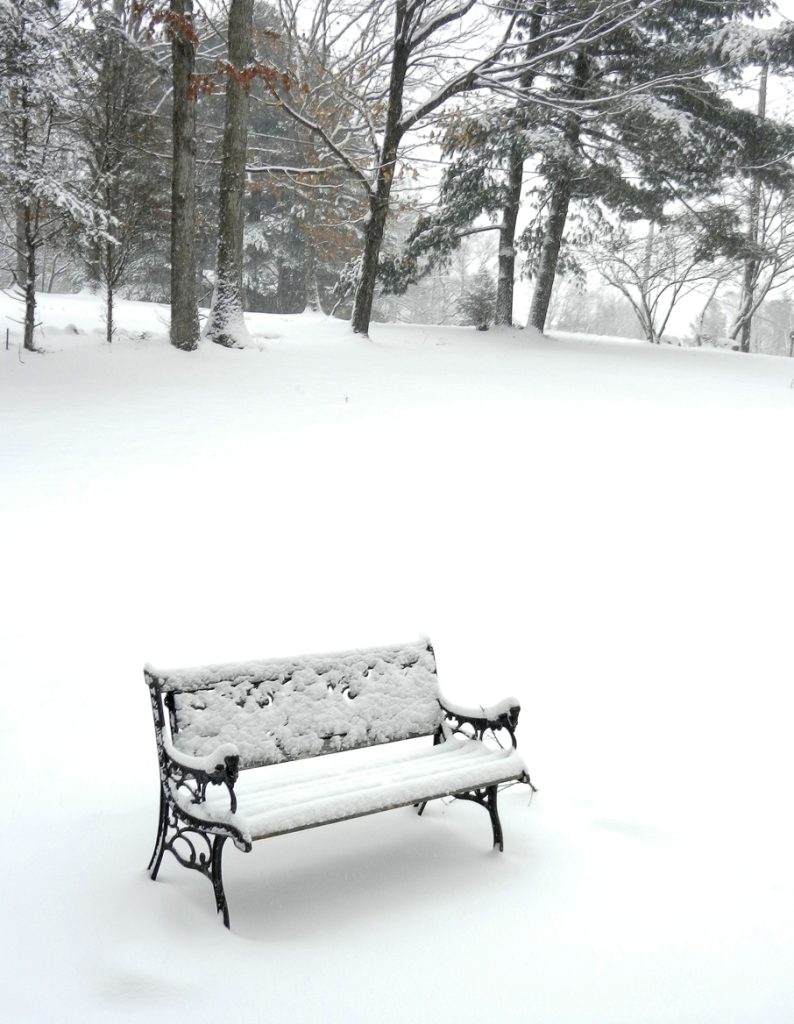
Here are examples of the same scene shot with and without increased exposure value:
You’ll notice that the first image is correctly exposed…the snow is white and there is a good range of tones in the remainder of the picture. This image was made by adding +1 to the exposure value, which reset the mid-tones, making the snow appear white. The second picture was shot without any corrections, and you can see how grey the entire photo appears.
So, if you’re in the throes of yet another snowfall like I am here in the studio, you can wander out and take some beautifully exposed photos while you’re building your snow fort, or opt to wait until summer to test this out at the beach!


